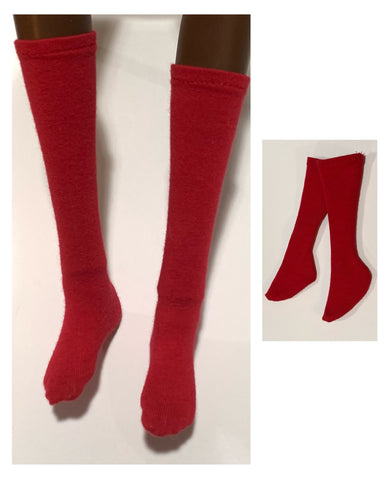
How To: Draft and Sew a Doll Sock Pattern in 10 Easy Steps
Pattern Drafting can be an intimidating process to someone without prior training. However, learning anything new is always intimidating but once you learn it, it seems easy! Let's start with something relatively simple like a pair of socks! Following is a picture tutorial on how to draft a pair of socks using a Smart Doll.
1. Start by wrapping a rubber band around the doll's leg at the place where you want the sock to stop.

2. Wrap the doll's leg with a stretch knit fabric (similar to what you will use to make the socks) and pin in place.

3. Hand sew taut against the leg/foot and remove the pins. Trim the excess fabric.

4. Freehand the center line and around the rubber band guideline for reference. Remove the sock.

5. Draw a straight line on a piece of paper. Fold the sock in half along the center line and tape the fold along the straight line on the paper.

6. Use a sewing pin or a needle point tracing wheel to mark the shape of the sock on paper. Remove the sock.

7. True up the lines. Do this by drawing a 90 degree line at the highest point across (perpendicular to the straight line) to the width of the sock. Next, draw another short 90 degree line down (perpendicular) from the end of the width of the sock. Then freehand controlled curves, connecting the dots, to complete the rest of the sock. Please note that the dots are guidelines. You will not always follow them exactly as seen in the picture. Cut this pattern out.

8. Draw another straight line on paper and trace the new sock pattern on either side of the straight line. The straight line is the grainline.

9. Add a seam allowance.

10. Cut out two patterns in fabric. Fold the top down and hem. Then with the right sides together, sew along the seam allowance. Turn inside out. Do this for each pattern and you will have a complete pair of socks!
*Please note: The pattern is not always perfect the first time. Sometimes you will have to sew up the pattern first in order to see mistakes that need to be corrected, then make adjustments. I was able to make a perfect sock pattern the first time around but that is not always the case!
If this was helpful, please leave a comment below!